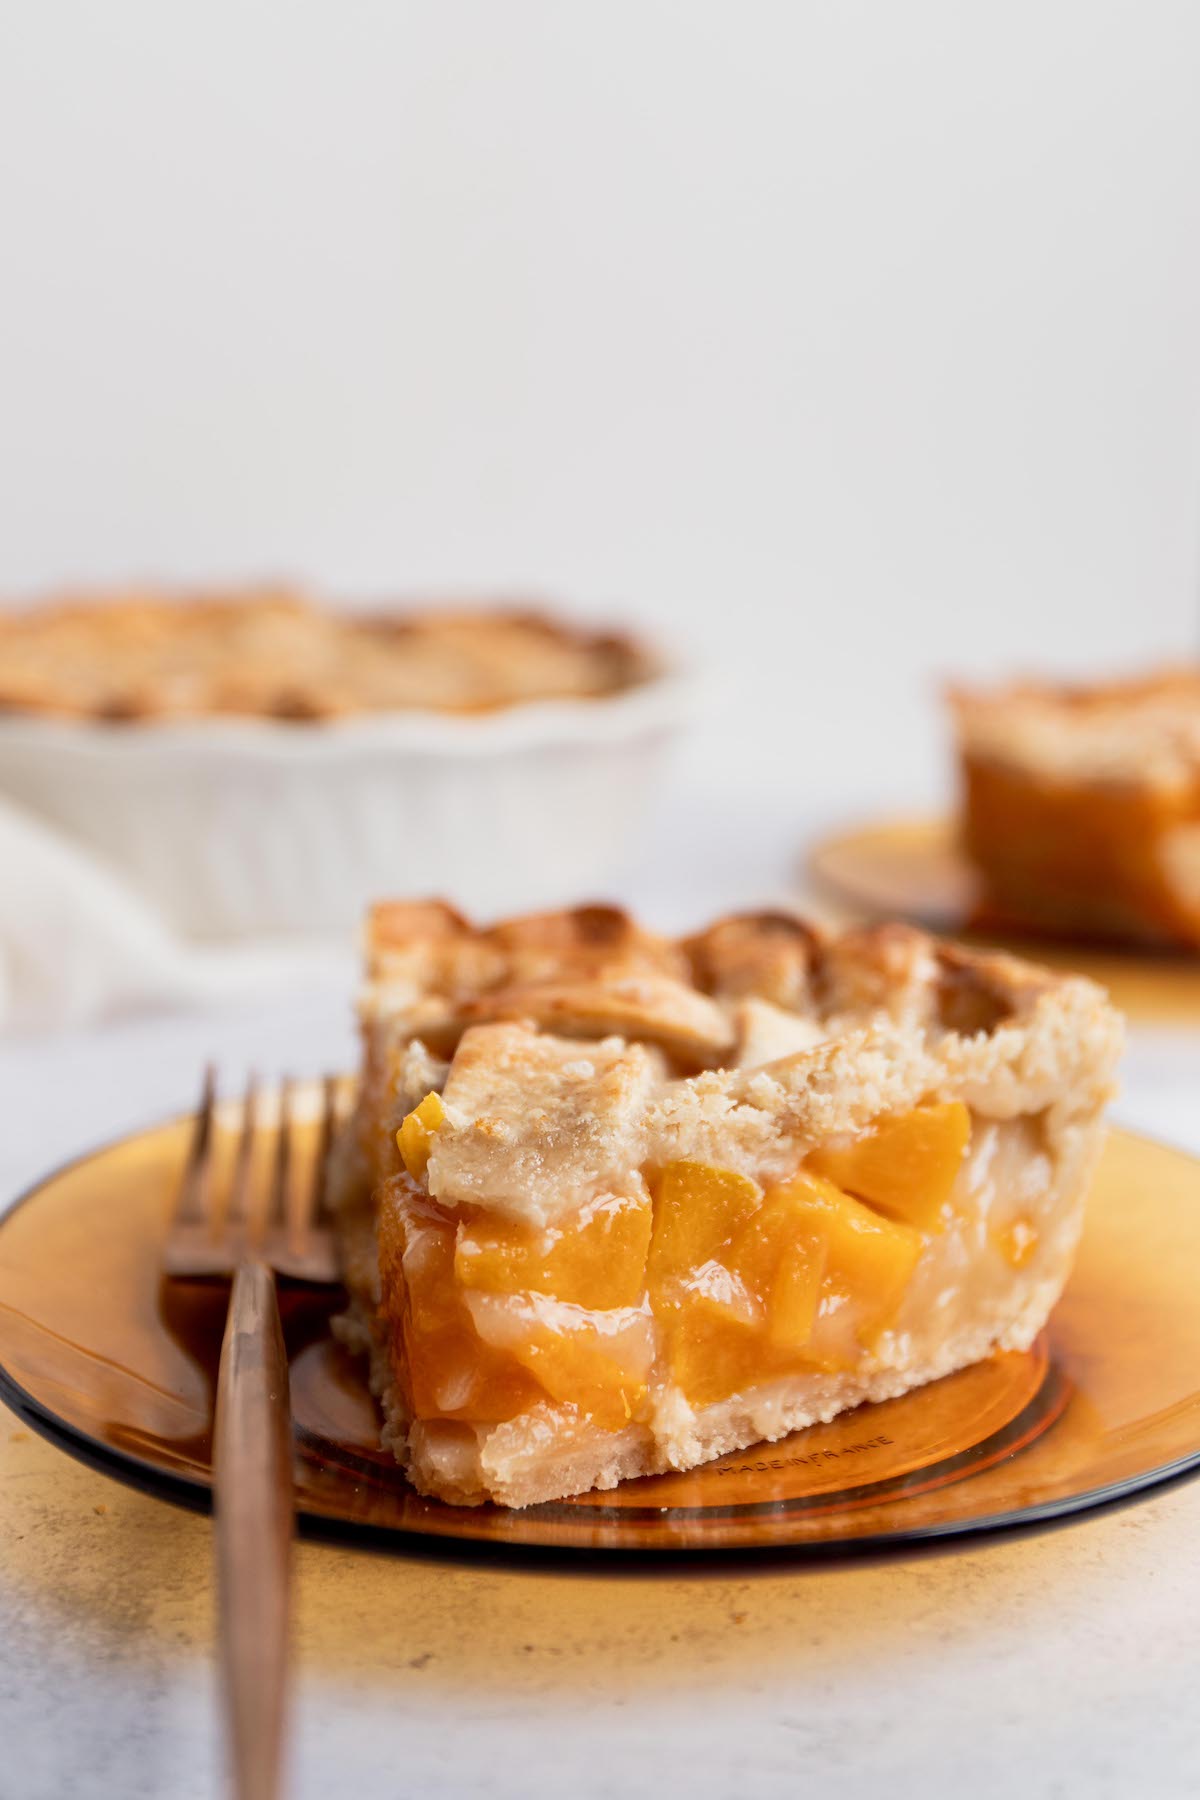
This easy peach pie with canned peaches is healthier than most and an absolute breeze to make. It’s one of the best ways to turn a pantry staple like canned peaches into a classic homemade dessert.
Jump to:
Why You Will Love This Recipe
This pie is a slightly healthier version of a traditional peach pie. But you would never guess from the taste. It’s packed with sweet and fruity peach flavour, with the perfect flaky crust that just melts in your mouth.
How to Make Pie Crust
Baking the perfect pie crust is no easy feat, so if this is your first time baking a pie from scratch and you just want to enjoy a slice of warm, homemade pie without having to wreck your head with things like kneading, chilling and rolling the dough, there’s no shame in going with store-bought crust.
But if you’re up for a challenge, I’ve prepared this vegan pie crust baking tutorial to guide you through the process of making a homemade vegan pie crust.
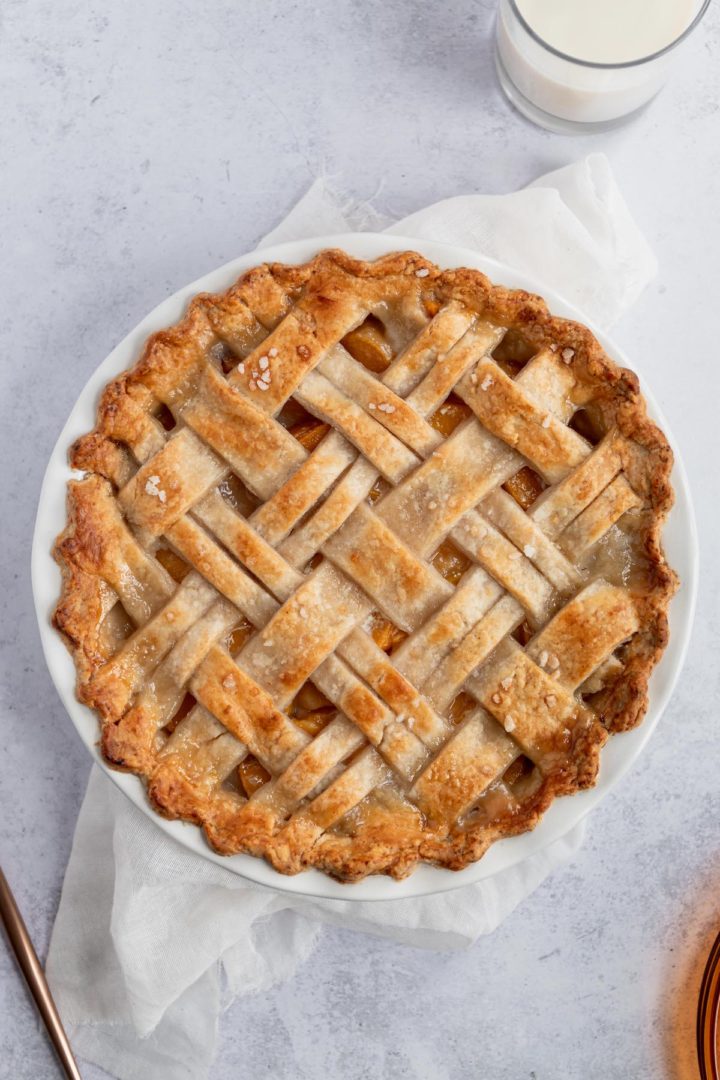
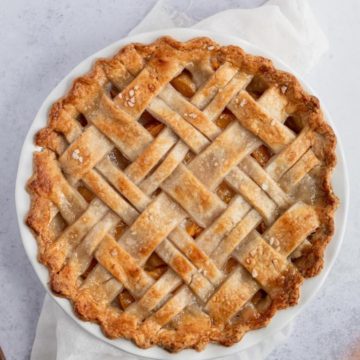
How to Weave a Lattice Pie Crust Design
For stylistic purposes only, I made this peach pie with a lattice top. And if you’ve never made a lattice pie crust, I know it can look a bit daunting. But I promise you, it’s so much easier (and more fun) than it looks. Here’s how you do it:
- Roll out the crust into about 12-inch circle, and then use a pizza cutter to make about ½-inch wide strips.
- Lay about the pieces of strips down one way, then start in the middle going the other direction, and alternate every other strip between pulling back and overlapping them.
Watch this video tutorial on how to weave a lattice top for pies for a more descriptive explanation!
If you’re still shaking your head no right now thinking, Do I really have to do all this just to eat a slice of warm peach pie? the answer is, of course not. You can either lay the strips across each other (without braiding them), or you can simply place the entire piece of dough over the top of the dish, trim the edge and crimp it together, and cut 1-inch slits in the top to release steam.
Do I Have to Blind Bake the Crust?
Nope, not for this recipe.
Blind baking is a fancy term that simply means baking an empty crust, usually weighed down by pie weights or some dry beans to prevent the dough from puffing up.
This step is usually required with pies where you want the crust to remain crunchy despite a very moist filling, for example when you’re making quiche, no-bake pies, custard pies, cream pies or pudding pies. Luckily, this easy peach pie is none of those things, so you don’t have to worry about blind baking in this case.
If, however, you want to learn more about the mystery of blind baking pie crusts, here is a very detailed guide on how to blind bake pie crust that will answer all of your questions.
Pie Filling from Canned Peaches
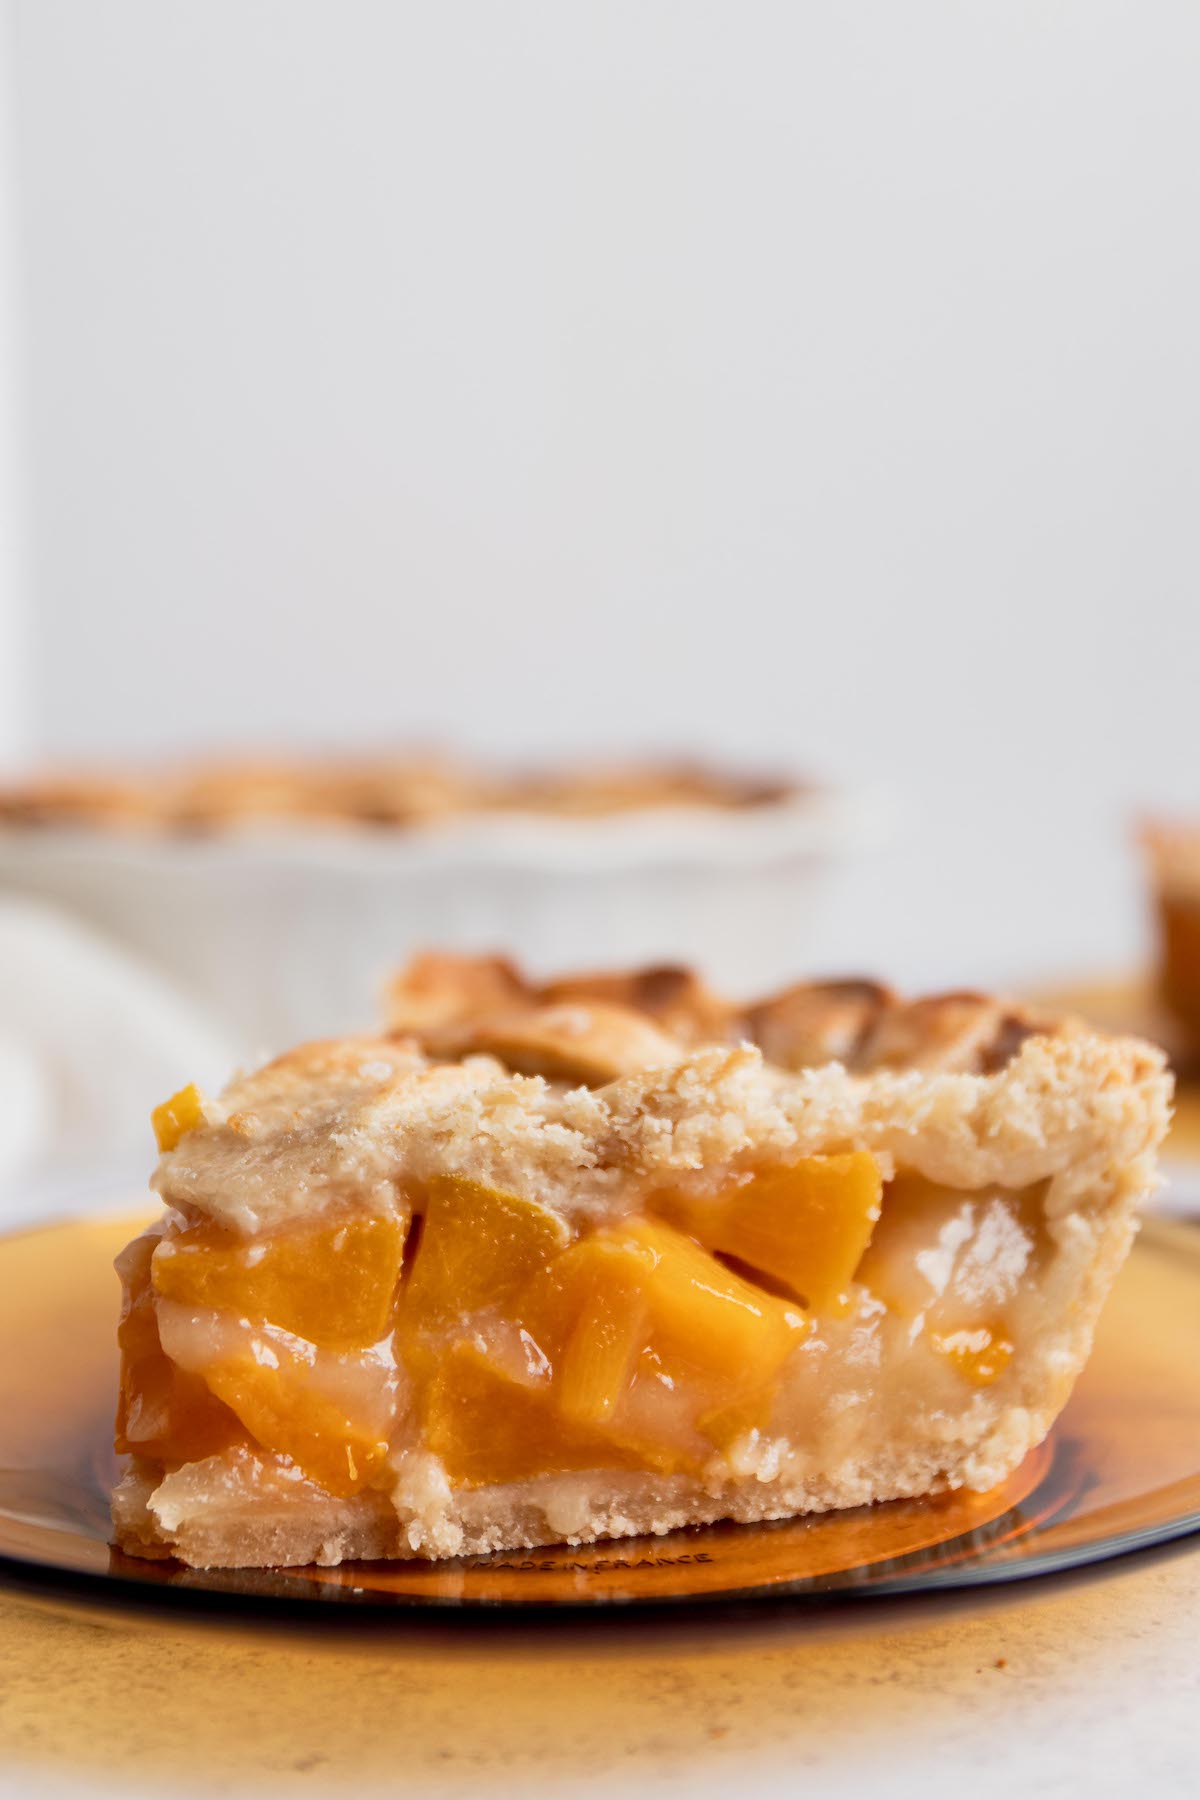
To prepare the filling, start with 5 cups of canned peach slices, drained. You can also use fresh peaches if you prefer (see below), but this recipe was designed to work perfectly with canned peaches for convenience and year-round accessibility. Make sure to use canned peaches in juice or light syrup, and to drain them well to avoid a soggy crust.
Why Use Canned Peaches?
Canned peaches are ripe, sweet, and ready to go—no peeling or boiling water needed. They give this pie the perfect juicy flavour and soft texture without any fuss. Plus, using canned fruit means you can enjoy peach pie any time of year, not just during peach season.
Using Fresh Peaches
One of the things I love most about this recipe is that it works well with both canned and fresh peaches. If you’re making this in the winter, or if you don’t have any perfectly ripe, sweet and juicy fresh peaches at hand, you can use canned peaches and the pie will turn out great.
However, you can also use fresh peaches. This will require a bit of extra work, as you’ll need to peel and slice them.
To do this, simply cut an “x” on the blossom end of the peach (the tip of the fruit opposite the stem side) and dunk each peach into boiling water for 30 to 60 seconds before dunking into an ice bath. The skins should peel off easily if the peaches are ripe enough.
It’s important to note here that if your fresh peaches are not perfectly ripe, sweet and juicy, it’s better to go with canned peaches. Hard and flavourless peaches can ruin the pie.
Canned Peach Pie Tips
- Use sliced peaches, not peach pie filling.
- Drain and pat dry for best results.
- For a thicker filling, toss canned peaches in 1–2 teaspoons of cornstarch.
- Add a pinch of cinnamon or nutmeg to elevate the flavour.
💬 Canned Peach Pie FAQs
Yes, definitely drain them! You want to avoid too much liquid in the pie filling, or you’ll end up with a soggy crust. Just open the can, pour the peaches into a strainer, and let them sit for a minute or two to drain off any juice or syrup. You can even pat them dry a bit with a paper towel if they’re very wet.
This depends on how sweet you want your pie. If your canned peaches are packed in heavy syrup, giving them a quick rinse can help tone down the sweetness a little. If they’re in natural juice or light syrup, rinsing usually isn’t necessary.
Not for this recipe. Peach pie filling from a can already has sugar and thickeners added, so it’s not a straight swap. If you use canned peach pie filling here, the pie will likely turn out too sweet and too gooey. Stick to canned peach slices in juice or syrup for best results.
You’ll need about two standard 15-ounce cans of sliced peaches to get 5 cups (after draining). If the can is larger or says something like “sliced peaches in heavy syrup,” that’s totally fine — just drain well.
Yes, you can — just know the pie will be a little sweeter. If you want to balance it out, you could reduce the sugar slightly in the filling or give the peaches a rinse before mixing them in.
No, no cooking needed! That’s one of the best parts of using canned peaches. They’re already soft and sweet, so you can just mix them with the rest of the filling ingredients and pour straight into the crust.
Yes! Just make sure the fresh peaches are very ripe and juicy, or they might not blend well with the texture of the canned ones. And peel them first — no one wants chewy peach skin in their pie.
It can be. The peach filling is 100% vegan and if you’re making this pie with any vegan pie crust, like this vegan pie crust with coconut oil, the pie will be vegan. However, you can just as easily use the same peach filling with your favourite pie crust, vegan or non-vegan, homemade or store-bought.
To maximise the shelf life of peach pie, cover it loosely with foil or plastic wrap. The pie should last about 2 days at room temperature and about 4-5 days in the fridge, covered loosely with foil or plastic wrap.
Yes. To freeze peach pie, wrap it tightly with aluminium foil or plastic freezer wrap, or place it in a heavy-duty freezer bag. When properly stored, peach pie will maintain best quality for 6 to 8 months in the freezer, but it remains safe to eat even beyond that time.
🍑 More Peach Recipes
Yep. If you’re a fan of peach desserts, I recommend trying out my vegan peach cobbler, this breakfast peach crisp or a strawberry banana peach smoothie.
🥧 More Vegan Pie Recipes
If you’re looking for a different vegan pie, give these a go:
Or, click here for a complete listing of vegan pie recipes.
Canned Peach Pie Recipe
Ingredients
- 2 pie crusts (store-bought or homemade)
- 5 cups (770 g) sliced peaches, canned and well drained (or fresh, peeled & sliced – see notes)
- ½ cup (60 g) all-purpose flour
- ¾ cup (150 g) sugar
- ½ teaspoon vanilla extract
- ¼ cup (60 g) milk
- 2 tablespoons sugar (for topping)
- 2 tablespoons coconut oil, melted (for brushing crust)
- ¼ teaspoon cinnamon (optional, for topping)
Instructions
Prep the Crust
- If using homemade crust, prepare it first. Place one crust in a 9-inch pie dish and set aside.
- Preheat oven to 420°F (210°C).
Make the Filling
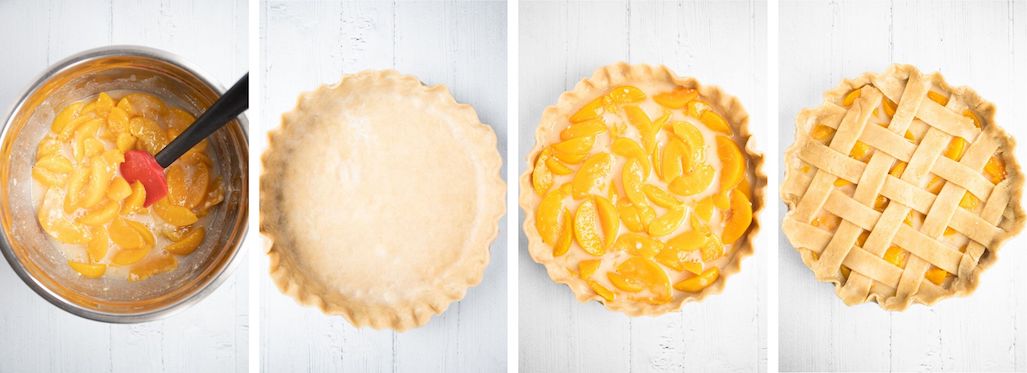
- For canned peaches: Drain thoroughly. In a large bowl, gently toss peaches with flour, sugar, vanilla, and milk.
- For fresh peaches: Peel and slice. To peel, cut an “X” at the base of each peach, boil for 30–60 seconds, then transfer to ice water. Skins should slip off easily.
Assemble the Pie
- Pour the peach filling into the prepared crust.
- Roll out the second pie crust into a 12″ circle. Using a pizza cutter or a sharp knife, slice dough into ½″ pieces and start placing on top of pie dish, creating lattice design; tuck or pinch dough together for crust edge. Alternatively you could place entire piece of dough over top of dish, trim edge and crimp together and cut 1″ slits in the top to release steam.
Add Topping
- Brush the top of the dough with melted coconut oil and sprinkle with coarse sugar and ground cinnamon if using.
Bake
- Bake at 420°F (210°C) for about 15 to 20 minutes.
- Reduce oven temperature to 350°F (175°C) and bake an additional 40–45 minutes, or until golden brown. Rotate the pie halfway through if needed for even browning.
Cool and Store
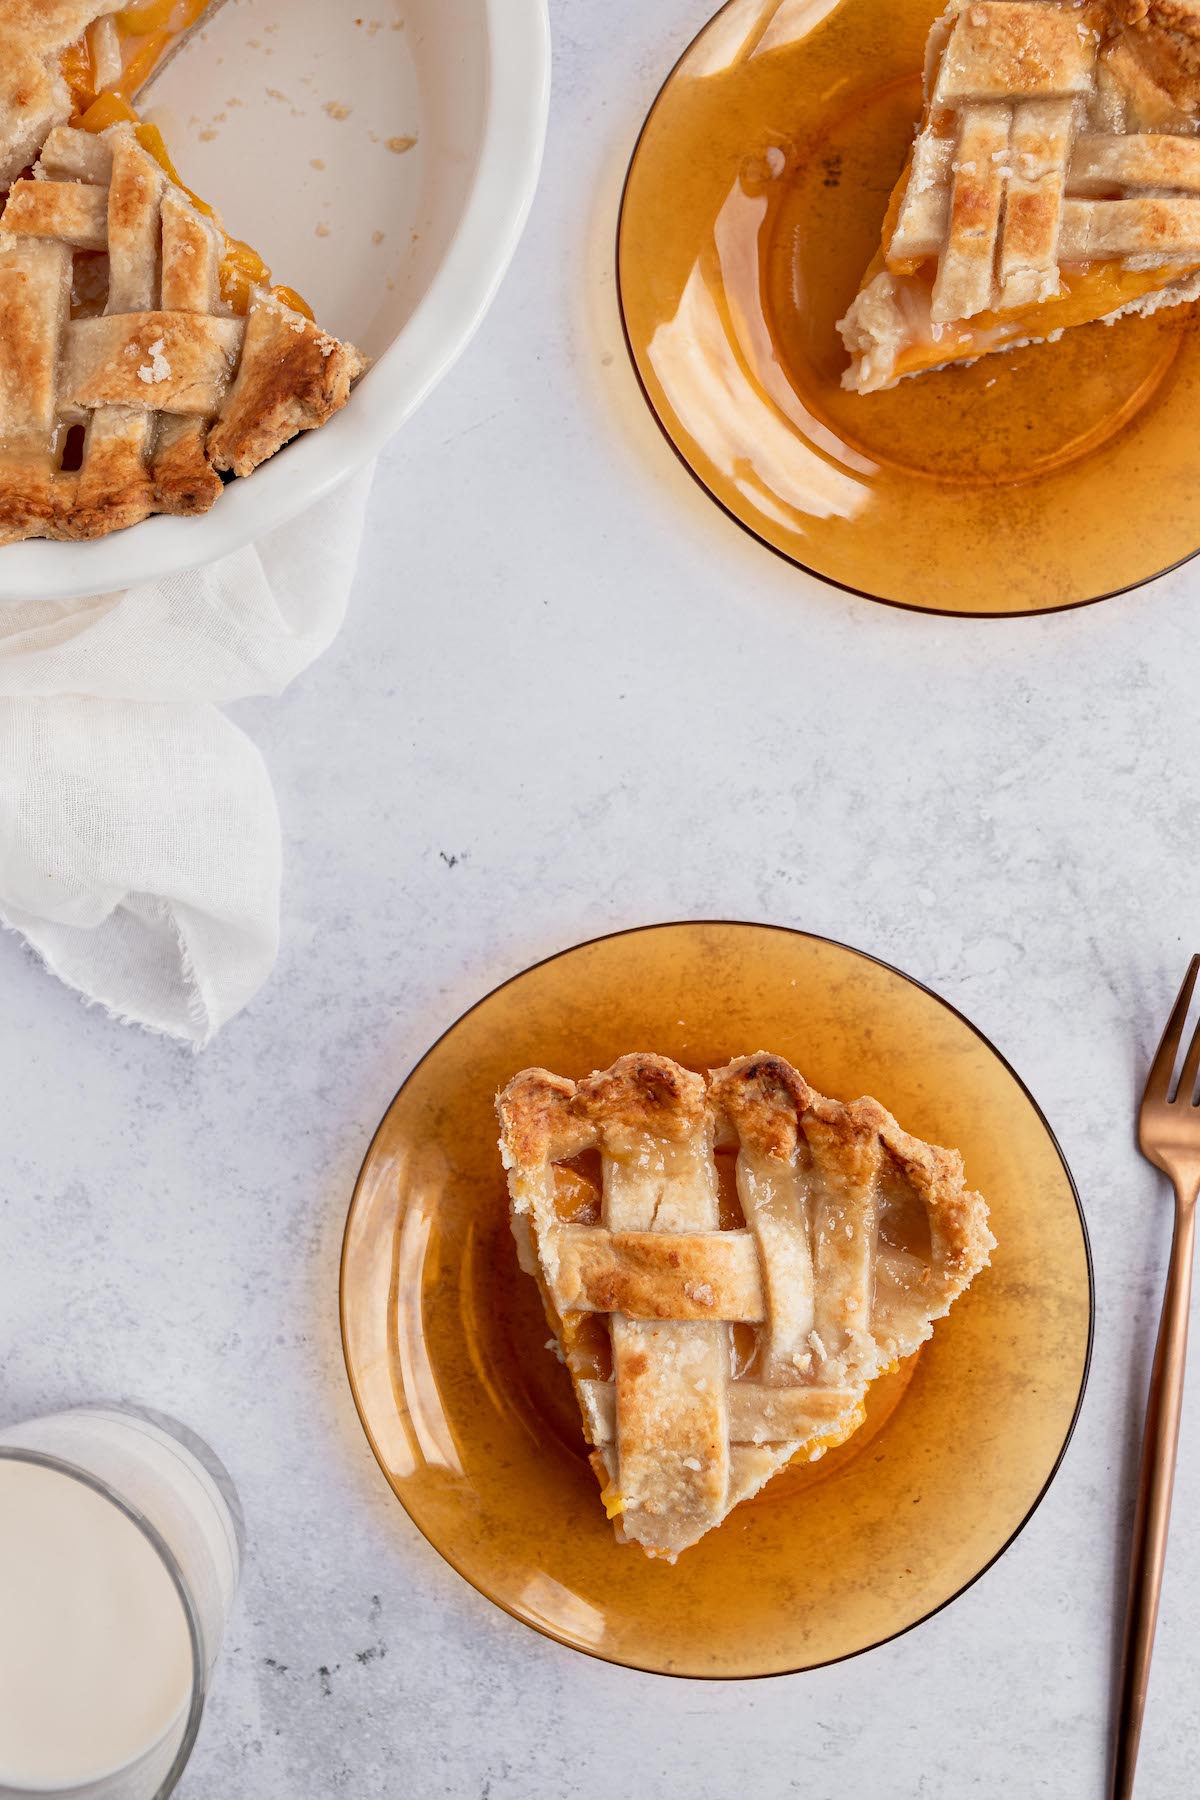
- Let the pie cool completely at room temperature — about 3 to 4 hours.
- Store covered in the fridge for up to 5 days, or up to 8 months in the freezer (see notes above for more information on storing and freezing).
Notes
- For best results with canned peaches, use ones packed in juice or light syrup — and drain well.
- Avoid using canned peach pie filling, which has added sugars and thickeners.
- To reheat slices: warm in a 300°F oven for 10–15 minutes or microwave briefly.
- Please note that the nutritional information for this recipe is for the filling only.


Anonymous says
So simple, yet so tasty! Will make again.